People are amazed to find how simple it is to create a no-dig edging around your flower beds. In fact, this is an incredibly easy DIY project that only requires four materials and a little bit of work. In no time, one will have beautiful garden edging and a breathtaking yard.
Be sure you watch the entire video below courtesy of MaxPatch67. (It explains all the steps required for No-Dig Edging)
Video Credit: MaxPatch67
This project is meant for areas outside your home that border your grass (you can protrude into the grass a bit if you’d like, though). Beautify your home and enjoy fragrant flowers or herbs by using these simple steps below.
The four materials that you’ll need to start out are:
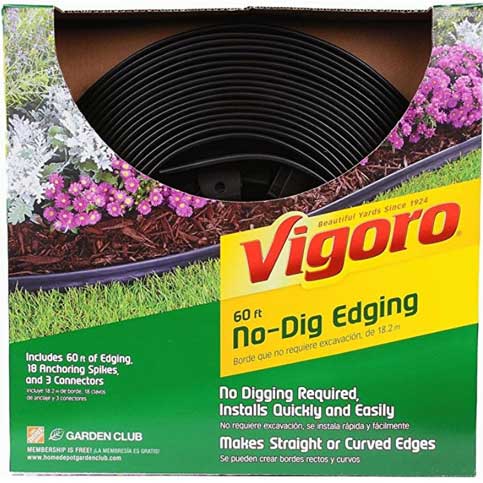
- Vigoro no-dig edging
- Metal spikes
- Fast setting concrete mix
- Landscaping blocks
All of these items can be purchased at your local hardware store or gardening store. The number of supplies will depend on the amount of space that you are looking to cover.
Step 1: Buy four important materials such as Vigoro no-dig edging
The four materials that you’ll need to start out are:
- Viagro no-dig edging
- Metal spikes
- Fast setting concrete mix
- Landscaping blocks
All of these items can be purchased on Amazon. The number of supplies will depend on the amount of space that you are looking to cover.

Vigoro Durable, Multi-Use, Easy to Install. You can purchase no-dig edging on Amazon here
Step 2: Start by laying out the plastic border
You need to put your plastic border in place. Pick the location very carefully. You will be securing the border with spikes, and it’s not always easy to move the border after it’s in place.
Step 3: Place metal spikes at right distances
Use metal spikes to keep the plastic border in place. For a standard plastic border, you will put a spike in every third loop (leaving two loops in between every spike).
Step 4: Hammer the metal spikes to stabilize the plastic border
Use a hammer to secure the spikes and keep the plastic border in place. Be sure to use proper safety precautions when using a hammer.
Step 5: Apply the fast-setting concrete mix
You need the concrete to secure the landscaping blocks that you bought for this project. Pour a generous amount of concrete mix at the edge of the plastic border. (MAKE SURE TO USE GOGGLES AND GLOVES)
Step 6: Gently firm the concrete mix
The concrete must be condensed after it is poured. Use your hands to make the concrete firm. Do this the entire length of the concrete that you poured. (MAKE SURE TO USE GOGGLES AND GLOVES)
Step 7: Level to evenly spread the concrete mix
Now, you need the concrete to be even. Use a wooden board or a shovel to level the concrete. You can determine how far out the concrete should go by using one of the landscaping blocks as a guide.
Step 8: Start laying the blocks
Now that the concrete is level, it’s time to place the blocks where you’d like them to go. At this point, you should know how many blocks you will need and how to space them. Place the blocks as quickly as possible once you put the concrete down.
Step 9: Gently press the blocks using hands
Once the blocks are placed and everything looks good, you’ll want to press down on the landscaping blocks to ensure that they are secure in the concrete. Using your hands will be enough pressure.
Step 10: Spray thoroughly with a mist of water
To set the concrete, spray the concrete and landscaping blocks with water. You don’t need to completely drown the area in water, but you should ensure that everything is thoroughly wet down. This will allow the concrete to keep the blocks in place.
Now that you have a beautiful border, you can utilize the rest of the area however you’d like. Be creative and have fun!


