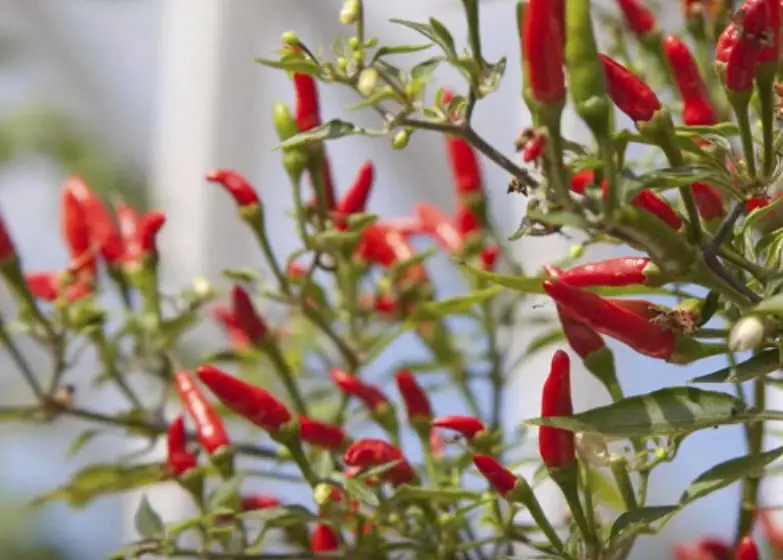
Whether growing your hot chili peppers indoors or out, this video will show you what you need to do to grow, nurture and harvest your chili peppers.
The video below shows you how to start chili peppers indoors from seed, how to pinch back the plant to encourage greater harvests and how often to water and fertilize the growing plant. There are also steps that cover how to successfully grow plants indoors.
Once your plant is harvested, the video describes how to dry peppers for later use. Not all peppers are suitable for drying, and the video explains how to choose which peppers to save. By following each step, you will grow healthy peppers that are good for a variety of dishes and preparations.
Knowing how to care for your plants will help you give them what they need to produce healthy, good-tasting peppers in large quantities.
Step 1: Sow in Spring
Chili peppers are hot weather plants. Since they prefer temperatures within 68-72 degrees Fahrenheit (20-24 degrees Celsius), seeds are usually sown indoors in small pots or seed trays.
Step 2: Germinate Seeds
Once you have established a warm spot for your seeds, plant them in their growing containers and with seed compost. Water the plants, allowing water to drain.
Seedlings emerge within a week or two of sowing. As they grow to maintain a warm temperature, above 64 degrees Fahrenheit (18 degrees Celsius) and provide the plants with bright light.
Step 3: Changing Pots as Plants Grow
Transfer plants into larger parts with multi-purpose compost. When plants are 4-inches (10-cm) tall feed them using liquid tomato fertilizer.
Step 4: Snip Off a Few Stems
When plants reach 8-inch heights (20-cm) snip back a few top stems. Doing this encourages
the growth of additional fruiting stems.
Step 5: Bring Pots Outside to Tighten Up
Indoor plants are not hardy for outdoor temperatures, even when it is warm outside. Transition your plants for outdoor life by bringing them outside during the day. Place them in a warm, slightly shady spot. Doing this for about a week will help your plants adjust to outdoor temperatures and daylight.
Step 6: Plant Outs
If you plan to grow your plants in soil, then you will have to remove plants from their pots and place them into a prepared spot. Dig a hole in the planting spot that is the same depth as the plant pot. Remove the plant and place it in the prepared hole, watering it well. If your garden has slugs, this is a good time to lay down slug repellent pellets.
Step 7: Use Sturdy Stake for Support
Chili pepper plants require staking. Choose a thin, but sturdy, wooden stake and insert it in the growing medium near the plant. Tie the plant to the stake using soft material. If your chili pepper plant produces large peppers, then use multiple supports to keep the plant from toppling.
Step 8: Continue Growing Indoors
Some climates do not allow for pepper growing outdoors, or you may simply choose to grow your plants indoors. If this is the case, then move your plants into larger pots that will accommodate the rest of their growth. Pots with 10 inch (25 cm) diameters are the best size. Move plants to a sunny window where they will receive bright light.
Step 9: Feed and Water Plants Regularly
Pepper plants need water and nutrients to grow. Plants in containers require more water than plants in the ground, but both must be watered regularly. Also provide fertilizer regularly to encourage healthy growth.
Step 10: Harvest if Large Enough
Within several weeks peppers are ready to harvest. Harvest according to size, and not color. Green peppers and red peppers can be harvest when they are large enough. When it comes time to dry your peppers, choose peppers that have thin skins. They are less likely to rot. Thin-skinned peppers can be dried on racks in well-ventilated areas that are dry and warm.